
Hello, Excel enthusiasts! It’s Samina from SkillUpandExcel. Welcome back to my channel, where I bring you the best tips and tricks to elevate your Excel skills. Today, I’m excited to share an incredible tutorial on how to send emails directly from Excel without using any coding or VBA. This powerful technique is perfect for anyone looking to streamline their workflow and enhance productivity.
Setting Up Excel for Email Automation
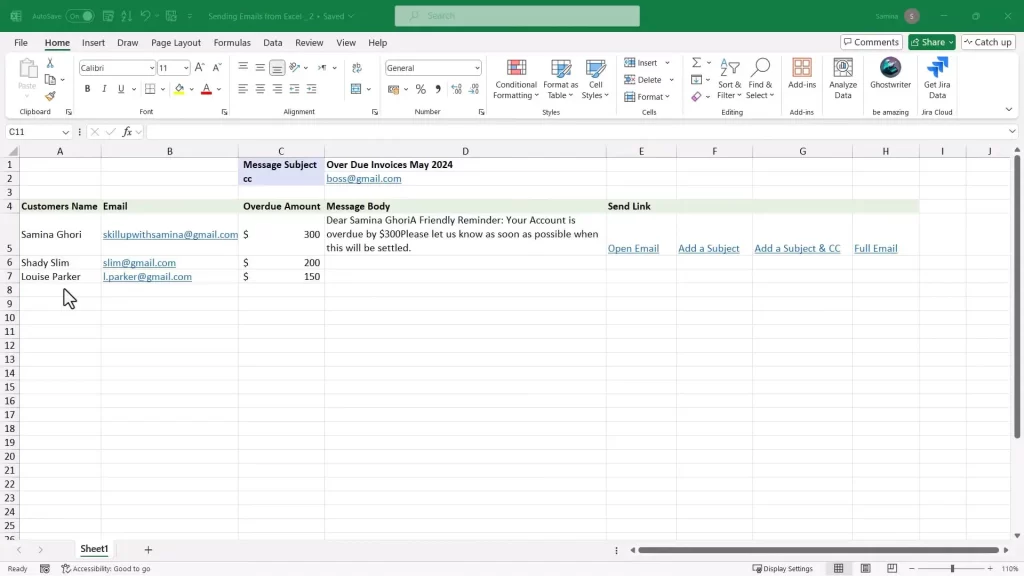
To begin, let’s set up your Excel workbook to send emails efficiently. Start by organizing your data in Excel, ensuring you have the necessary columns for email addresses, subjects, and message bodies. You can also include additional columns for CC and BCC if needed. To begin, open your Excel sheet and ensure it is set up correctly. You’ll need a table with the following columns:
- Customer’s Name: This column should contain the names of the recipients.
- Email Address: Corresponding email addresses for each recipient.
- Message Subject: The subject line of your email.
- Message Body: The content of your email.
You can also include additional columns for CC recipients or different message subjects if needed.
Sending Emails Using Hyperlinks
- Open Email: Use the formula =HYPERLINK(“mailto:”&B2,”Open Email”) where B2 is the cell containing the recipient’s email address.
- Adding a Subject: Use the formula =HYPERLINK(“mailto:”&B2&”?subject=”&D1,”Open Email”) where D1 is the cell containing the subject line.
- CC Recipients: Use the formula =HYPERLINK(“mailto:”&B2&”?cc=”&D2,”Open Email”) where D2 is the cell containing the CC email address.
- Adding a Message Body: Use the formula =HYPERLINK(“mailto:”&B2&”?body=”&D5,”Open Email”) where D5 is the cell containing the message body.
Step-by-Step Email Sending Process
Next, let’s walk through the step-by-step process of sending emails directly from your Excel sheets without any programming knowledge. We’ll use a simple formula to create a hyperlink that, when clicked, will open your default email client and populate the necessary fields.
Customizing Your Email Content
One of the key advantages of this technique is the ability to personalize your email messages. You can dynamically insert data from your Excel sheet into the email body, making your communication more effective and professional.
Best Practices for Email Automation
To ensure your emails are sent seamlessly, here are some tips and tricks:
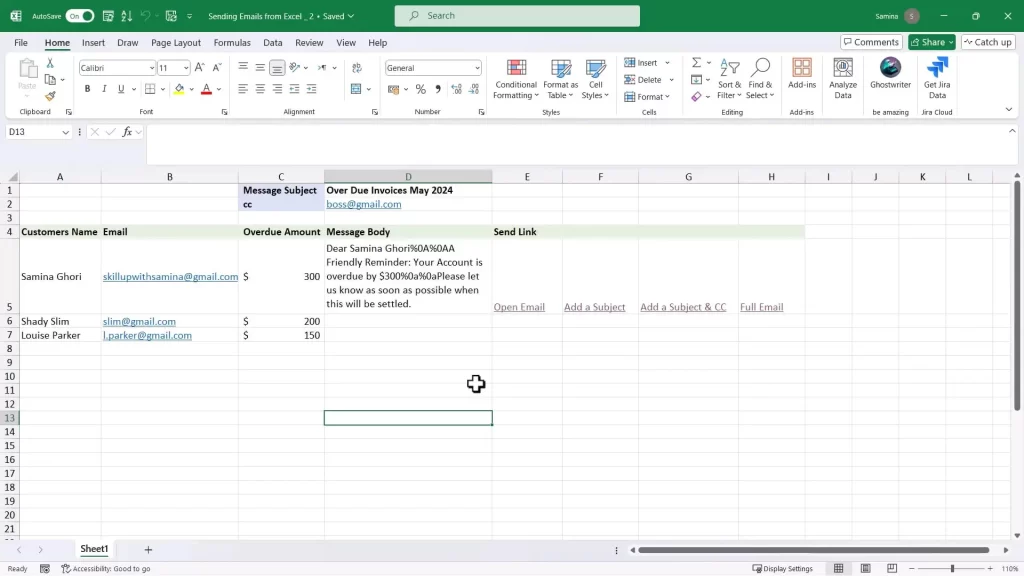
- Use the %0a to add line breaks in text for Outlook Emails.
The Hyperlink Formula
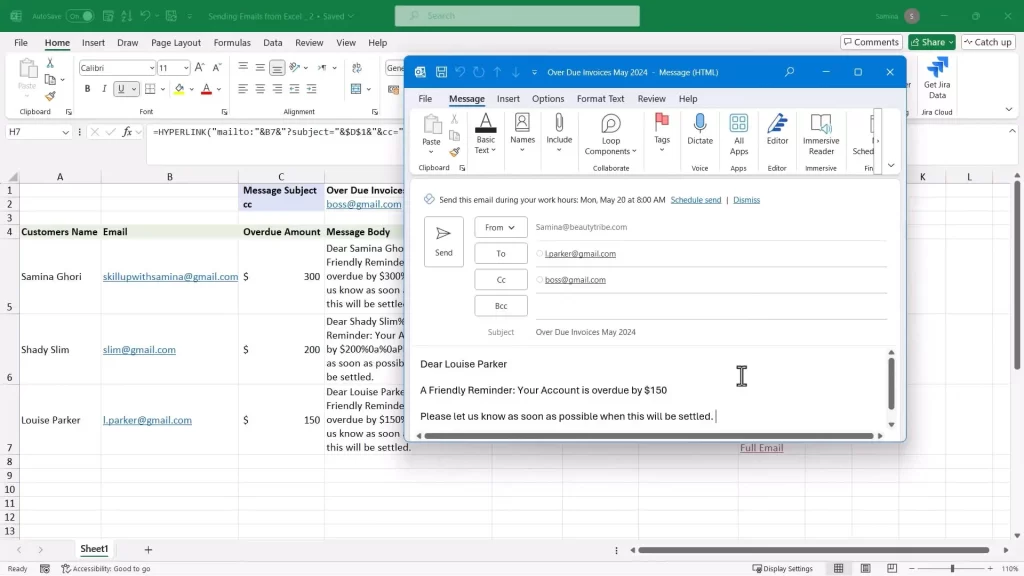
Here’s the formula to create a hyperlink for sending emails from Excel:
Excel Copy code
=HYPERLINK(“mailto:”&B5&”?subject=”&$D$1&”&cc=”&$D$2&”&body=”&D5,”Send Email”)
You can use this formula and change the cell references to suit your needs.
By mastering this technique, you can save valuable time and effort, making your daily tasks more efficient. Whether you’re managing projects, coordinating with your team, or handling customer communication, this tutorial will revolutionize the way you use Excel.
I hope you found this tutorial helpful. If you have any questions or would like to see more tutorials like this, please let me know in the comments below. Don’t forget to like and subscribe for more Excel tips and tricks. Until next time, happy Exceling!
Conclusion
Sending emails directly from Excel can significantly streamline your communication process. By utilizing simple formulas and cell references, you can automate email sending and save time on repetitive tasks. Give this method a try and enjoy a more efficient workflow!
I hope you found this tutorial on email automation in Excel helpful! If you have any questions or would like to share your experiences with automating emails, feel free to leave a comment below. Don’t forget to like and subscribe to my channel “Samina Ghori” for more Excel tips and tricks. Happy spreadsheeting!
Why You Should Watch This Video
- No Coding Required: This tutorial is designed for everyone, from beginners to advanced users, and doesn’t require any programming skills.
- Boost Productivity: Automate your email sending process and save hours of manual work.
- Enhance Communication: Ensure your emails are sent accurately and on time, improving your overall communication efficiency.
- Easy to Follow: Step-by-step instructions with clear explanations make this tutorial easy to implement.
Thank you! I hope you’ve learned something new and found this tutorial useful. If you did, I would appreciate a like and subscribe. Until next time, happy spreadsheeting!
FAQs
How can I send emails from Excel without coding?
Excel email automation eliminates the need for coding or VBA knowledge. By leveraging simple formulas and hyperlink syntax, you can dynamically generate email links directly from your Excel sheets.
Can I customize the email content?
Absolutely! Excel email automation allows for complete customization of email content, including subjects, CC recipients, and message bodies. Tailor your emails to suit your specific needs and enhance communication efficiency.
Is Excel email automation compatible with different email apps?
Yes, Excel email automation is compatible with various email apps, including Outlook, Gmail, and others. Simply adjust your default email app settings to seamlessly integrate with your preferred platform.
How can I ensure my emails are sent accurately?
By following the step-by-step instructions provided in this tutorial, you can ensure your emails are sent accurately and efficiently. Double-check your formulas and parameters to minimize errors and optimize email delivery.
Can I automate bulk emails from Excel?
Yes, Excel email automation allows you to automate bulk emails effortlessly. Simply replicate the email automation syntax for each recipient, making it ideal for sending mass emails without the need for manual input.